


Understanding Epoxy Resin Floor Basics
Epoxy resin floors have become a premier choice for both commercial and residential spaces seeking durability, aesthetic appeal, and long-term functionality. They are not merely coatings but sophisticated flooring systems that involve a chemical bond between the resin and the substrate, resulting in a seamless, high-performance surface. Whether transforming a garage, industrial warehouse, or retail space, understanding the fundamental aspects of an epoxy resin floor is essential to making informed decisions about installation, maintenance, and design options.
What is an Epoxy Resin Floor?
At its core, an epoxy resin floor consists of a two-part system: epoxy resin and a hardener, which, when mixed, create a durable material that bonds strongly to concrete and other substrates. Once cured, it produces a resilient, chemically resistant, and visually appealing surface. Unlike paint or simple sealants, epoxy floors form a solid plastic-like membrane that withstands heavy wear, impact, chemicals, and abrasion, making them ideal for areas subjected to high traffic and rigorous conditions.
Types of Epoxy Finishes and Their Applications
Epoxy floors come in various formulations tailored to specific needs. Some common types include:
- Solid Color Epoxy: Provides a uniform finish suitable for industrial facilities, garages, and commercial environments.
- Quartz or Aggregate Epoxy: Incorporates textured aggregates for slip resistance in warehouses or outdoor settings.
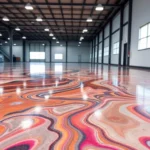
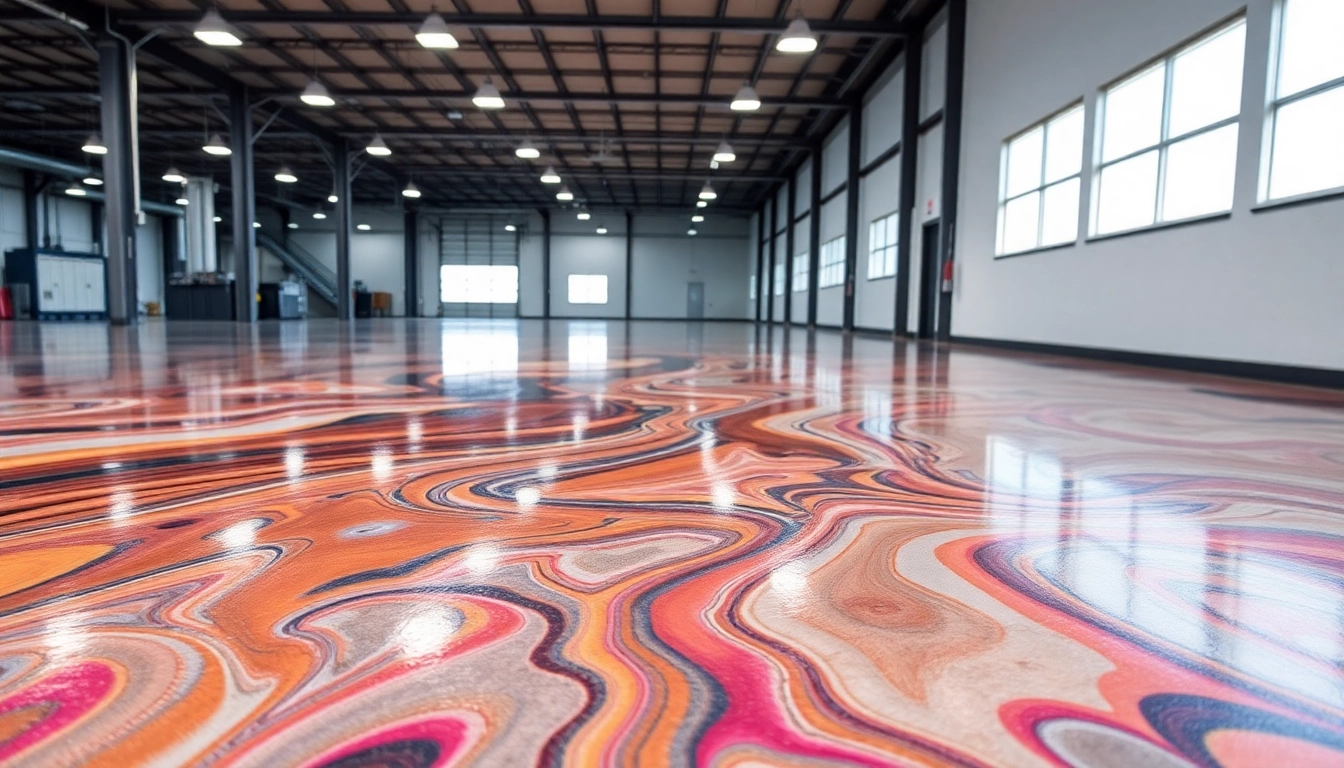
- Metallic Epoxy: Offers a glossy, high-end aesthetic with swirling colors and depth effects, popular in decorative and residential projects.
- Self-Leveling Epoxy: Ensures a smooth, flat surface ideal for showrooms, galleries, and spaces requiring a high-gloss mirror-like finish.
Choosing the right type depends on the functional demands, environmental conditions, and desired visual outcome.
Common Challenges in Epoxy Floor Installation
While epoxy flooring offers extensive benefits, it also presents challenges such as surface preparation complexity, environmental sensitivities during application, and potential for defects like bubbles or peeling if not installed correctly. Proper planning, skilled application, and clear understanding of curing times are crucial for a successful installation that meets expectations for longevity and appearance.
Preparing Your Space for Epoxy Coating
Surface Preparation and Cleaning
The foundation of a durable epoxy floor is meticulous surface preparation. Concrete must be clean, dry, and free from dust, oils, or previous coatings. Mechanical methods, such as shot blasting or diamond grinding, effectively remove existing coatings and open the pores of the concrete for better adhesion. Cleaning with degreasers removes all contaminants, and moisture testing ensures the substrate is dry enough to prevent future delamination or bubbling. A well-prepared surface can improve bonding strength by up to 50%, significantly extending the lifespan of the coating.
Selecting the Right Primer and Sealants
Primers are essential to enhance adhesion and seal the surface pores, providing a uniform base for the epoxy layer. The choice of primer depends on the concrete’s porosity and condition; for example, epoxy primers are common, but sometimes epoxy-polyurethane blends are recommended for high-moisture areas. Using the appropriate sealant can also prevent moisture ingress, which can cause bubbling and peeling, especially in basements or outdoor installations. Expert advice and manufacturer specifications should guide primer selection to optimize durability.
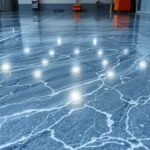
Environmental Conditions for Optimal Application
Temperature and humidity significantly influence epoxy curing and adhesion. Ideal conditions typically range between 10°C and 30°C (50°F – 86°F) with low humidity levels. Excessive moisture can interfere with curing, leading to a cloudy appearance or soft spots. Ventilation and temperature control during application and curing periods help achieve a smooth, defect-free finish. Precise environmental monitoring minimizes risks and ensures a high-quality outcome.
Step-by-Step Installation Process
Mixing and Applying Epoxy Resin
Accurate mixing is vital for epoxy performance. Use a clean, precise ratio of resin to hardener, typically 1:1 or 2:1 depending on product specifications, and mix thoroughly with a low-speed drill or paddle to avoid introducing air bubbles. Applying the mixture with a roller, squeegee, or notched trowel ensures an even coat. For large areas, working in manageable sections prevents mismatched drying times or inconsistencies. Proper mixing and application techniques can increase adhesion strength and improve aesthetic uniformity.
Techniques for a Seamless Finish
To achieve a flawless surface, multiple thin coats are preferable over a single thick application. Each layer should be applied within the recommended pot life, typically within 30-45 minutes of mixing. Using a roller or notched squeegee maintains consistency. For decorative finishes, such as metallic or quartz, additives are broadcast onto the wet epoxy to create textured or patterned effects. Professional installers often employ trowels or brushes to manipulate metallic pigments, ensuring swirling or marbling effects to produce a luxurious appearance.
Curing Times and Final Inspection
After application, curing times can vary from 12 to 72 hours depending on product specifications, thickness, and environmental factors. During this period, it is critical to prevent foot traffic or any disturbance. Once cured, a final inspection should check for film integrity, uniformity, and adhesion. Minor imperfections can sometimes be sanded and recoated, while significant issues require reapplication. Proper curing guarantees maximum durability and aesthetic quality.
Design Ideas and Customization Options
Color, Texture, and Decorative Effects
Epoxy flooring isn’t limited to plain finishes; it offers extensive customization. Color pigments can be combined with epoxy for vibrant, consistent hues, matching branding or aesthetic themes. Incorporating aggregates like quartz or mica creates textured effects, while metallic pigments introduce depth and movement, ideal for upscale settings. Decorative flakes or chips can be embedded for a terrazzo look or slip-resistant surface, balancing safety and style. Advanced techniques like stenciling or inlay logos can personalize commercial or retail spaces.
Adding Anti-Slip Features
Safety is paramount, especially in industrial or outdoor environments. Anti-slip additives, such as silica or polymer grit, are mixed into the epoxy or broadcast onto the surface during curing. These features provide traction without compromising the visual appeal. Proper specification and application guarantee that the floor retains its durability while mitigating the risk of slips and falls.
Incorporating Branding and Logos
For commercial spaces, custom logos, traffic arrows, or branding messages can be embedded directly into the epoxy surface. Stencils and bold color contrasts create eye-catching markers that enhance wayfinding and brand recognition. Integrated branding not only elevates aesthetics but also enhances functionality, making epoxy floors versatile for retail stores, showrooms, and corporate environments.
Maintaining and Enhancing Your Epoxy Floor
Cleaning and Regular Maintenance
To preserve the appearance and longevity of epoxy floors, routine cleaning involves sweeping or vacuuming loose debris and mopping with pH-neutral cleaners. Avoid abrasive scrubbers or harsh chemicals that can scratch or degrade the surface. Using mats or protective pads in high-traffic areas further extends the lifespan and maintains the floor’s glossy finish.
Repairing Minor Damage
Cracks or scratches may occur over time. Small damages can often be repaired by lightly sanding the affected area, cleaning thoroughly, and applying a fresh layer of epoxy or a compatible patch. For extensive damage, consulting with a professional ensures proper surface preparation and adhesion, preventing further deterioration.
Long-term Durability Tips
Long-term success depends on proactive maintenance: sealing periodically, avoiding harsh chemicals, and managing moisture levels. Implementing a regular inspection schedule helps identify issues early, preventing costly repairs and ensuring the epoxy floor remains functional and visually striking for years.